Are you ready to begin? I have all the necessary materials to begin here. Oh, you don't have any chocolate, we will wait while you zip off to the store. :-) Must. Have. Chocolate!
Then take your background fabric and cut it into 5" strips, you will need 11 strips total
Flip each strip the long way on your cutting mat and subcut into 4.5" rectangles. You will need 84 rectangles.
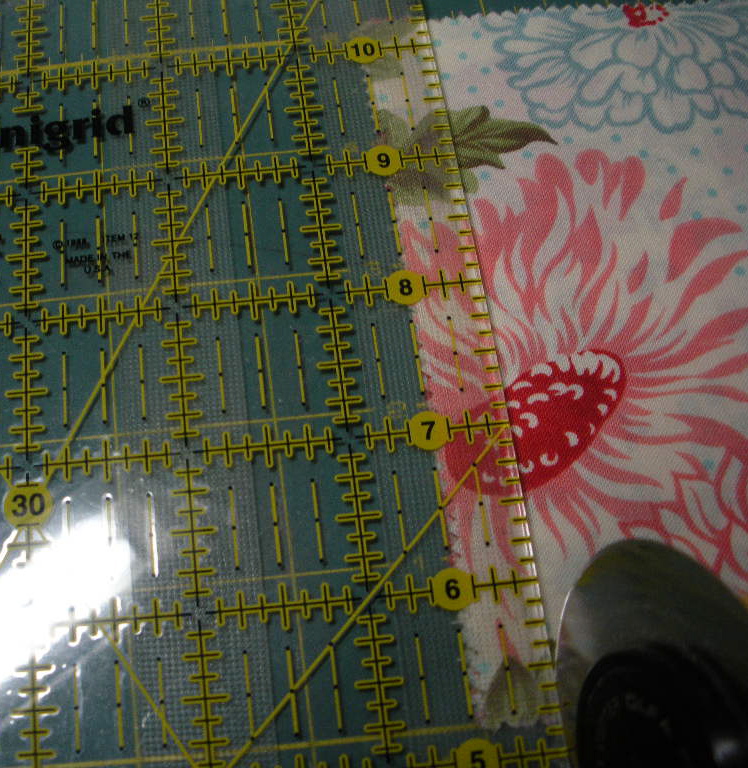
Take your rectangle and place it on your cutting mat with the 5" side on the bottom and top. Come in with your ruler 2" on the top and mark with a little dot. Do the same on the bottom coming in from the right hand side again measure 2" in and mark. You do not have to mark if you don't want. That is the beauty of this quilt..no templates and no marking. You can just line your ruler up when you make the diagonal cut.
With your ruler on your marked dots or coming in 2"from the left hand side on the top and 2" on the bottom from the right hand side make a cut diagonally upwards.
Take your charm pack and MAKE SURE THAT THE FRONT SIDE OF EACH SQAURE IS FACING UP( ask me how many times I haven't done this and have learned the hard way) If there is a pattern that you want to go in one direction now is the time to make sure that it is facing up now. You will cut off 1/2" of each of your charm squares. I stack a few and cut them all at once, but then I am a lazy quilter! LOL
Now with your charm squares in the center of your cutting mat(mine has 5" square area) with the 5" sides on the top and bottom. come in 2" from the top from the left hand side and 2" on the bottom on the right hand side and mark if you wish or just line your ruler up. Cut this upwards diagonally.
We should stop here, but I am always in a hurry to see how things are going to turn out so we will move ahead a little. Line up your pieces like in the picture to help you keep you from turning them in the wrong direction.
Line up your 2 pieces with a little tip sticking out below.
Chain sew your pieces together until you need a chocolate break. ;-)
Press the seam with the charm square part on the top and then press it open.
This is what your first part of the square will look like. You shouldn't have to trim it but you may with some of them.
On Tuesday we will start putting the parts together to make the whirlygigs. Now Jacque is trying to move to the front of the class and started her cutting early. LOL
Have fun and don't forget to post pictures on the flickr page http://www.flickr.com/groups/1347288@N21/
Cathy


Did it work? Am I at the head of the class? On my way over to Flickr now.
ReplyDeleteHow did it turn out? Going to have a boo at Flickr
ReplyDeleteThank you very much!!!
ReplyDelete